Here is the instruction guide on how to measure and adjust primary pilot pressure for HITACHI ZX890-7 excavator.
Related Contents:
2024 HITACHI AllinOne Tool 3.13
Hitachi Dr.ZX Excavator Diagnostic Tool Cable
Hitachi Excavator ZX-7 Service Repair Workshop Manual 2021 PDF
Preparation
1 Stop the engine.
2 Push the air bleed valve on top of the hydraulic oil tank and bleed air.
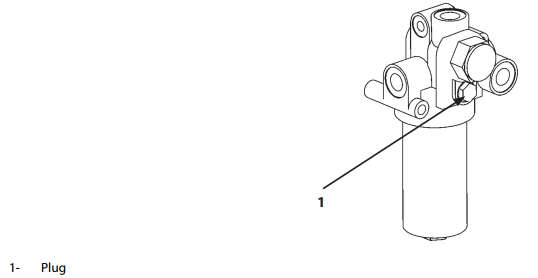
3 Remove plug (1) from the pilot filter. Install the adapter (ST 6069) and the pressure gauge (ST 6942) to the pressure check port.
: 19 mm

4 Start the engine. Confirm that no oil leakage is observed at the pressure gauge connecting part.
5 Maintain the hydraulic oil temperature at 50±5 °C.
Measurement
1 Follow the test conditions specified below.

2 Measure the pilot pressure without load by using the pressure gauge under each test condition in the table.
3 Repeat the measurement three times and calculate the mean values.
Evaluation
Primary Pilot Pressure Adjustment Procedure
Adjustment
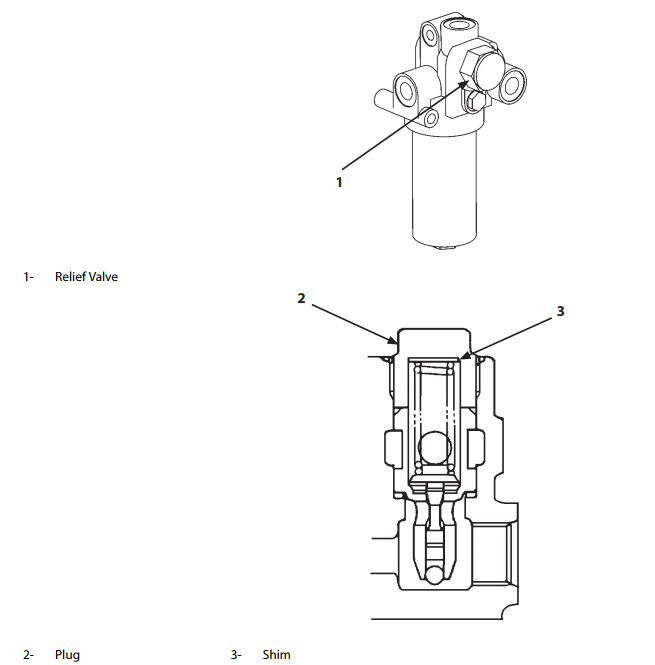
1 Remove plug (2) from relief valve (1).
42mm

2 Install the estimated quantity of shims (3).
3 After the adjustment, tighten plug (2).
: 25+2 N·m
4 After the adjustment, check the set pressure.
NOTE
Standard Change in Pressure (Reference)


